Using the Firefox cache to download images in bulk
Posted: 08 Jun 2022. Last modified on 09-Jun-22.This article will take about 5 minutes to read.
I recently bought a house! The layout is unconventional, so I wanted to keep a copy of the images in the listing as a reference as we renovate.
While inspecting the page, I realized that they were being loaded in asynchronously, so scraping was out. There were quite a few pictures, so I did not want to do Save as... for all of them. What to do?
At first I was stuck - but then I remembered that web browsers cache their images. They had to be available somewhere!
Environment
Since I’m on a Mac, I can’t guarantee that these steps will work on all platforms. Hopefully they are similar enough that you can follow along, even if you are on another platform.
I’m on MacOS Big Sur, with Firefox 101.0.
Brief overview - what is caching?
Loading images from the internet takes a long time. Depending on the size of the file and the speed of your connection, it can take seconds, or minutes for an image to load completely.
Thankfully, there is a really straightforward way to speed that up. A cache is a
software component that stores data so that future requests for that data can be served faster
Instead of going all the way to the place the image is originally stored, it’s possible to keep the image around, so that it’s already available when the browser asks for it. Neat!
In practice, when firefox (or any web browser really) loads large files like images, it will take some time to store them either in memory or on disk.
A memory cache is faster but only lasts until the application is closed. A disk cache is slower, but it can stay around indefinitely. Either way, retrievals will be much faster if we do not have to access the internet.
Finding your cache location
The first thing that you’ll need to do is find your cache location. If you navigate to about:cache you should see something like this:
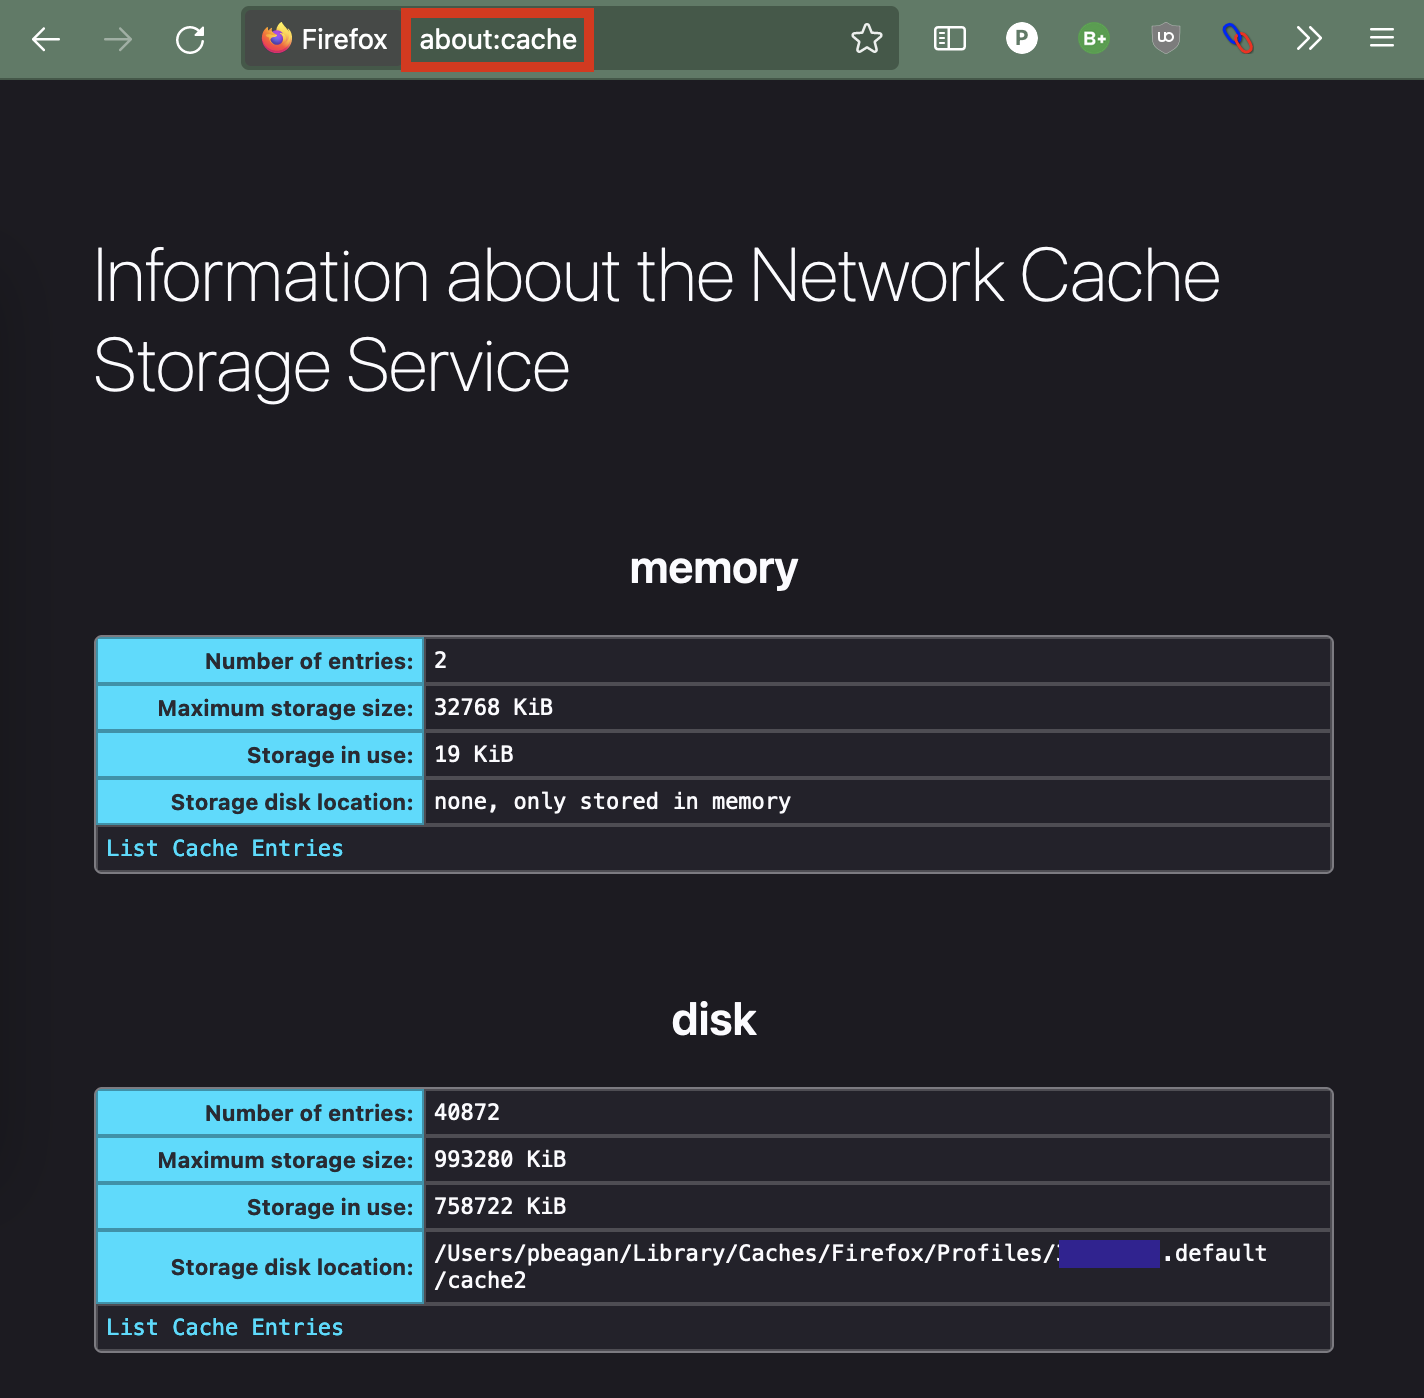
This gives you a lot of information about the information that firefox is storing locally. It also includes the path to the cache!
If you’re curious, you can cd over to that path in the terminal, and cat the entries there to see what is stored.
But if you want to proceed, the important part here is List Cache Entries. If you click on it, it will take us to a screen like this:
We’ve found the images! Huzzah!
But it looks like they are out of order! How can we move the most recent set of images to the top?
Priming the cache
The cached files are sorted by most recently modified. To move the images we want up to the top, we’re going to have to make firefox load them again.
Firefox’s developer tools make this pretty easy though. If you open them and go to the Network tab, you should see something like this:

If you check the disable cache button and reload the page, all of the images will be downloaded from the internet again. Take a moment to reflect on how much caching was improving the page performance!
One thing to note - some pages load images later on via javascript. A prime example of this is a slideshow, which might only load an image or two at a time. To make sure all of the images end up in the cache, you’ll have to make sure all of them get loaded.
You can follow along in the network tab to see your progress.
Copying the image file paths
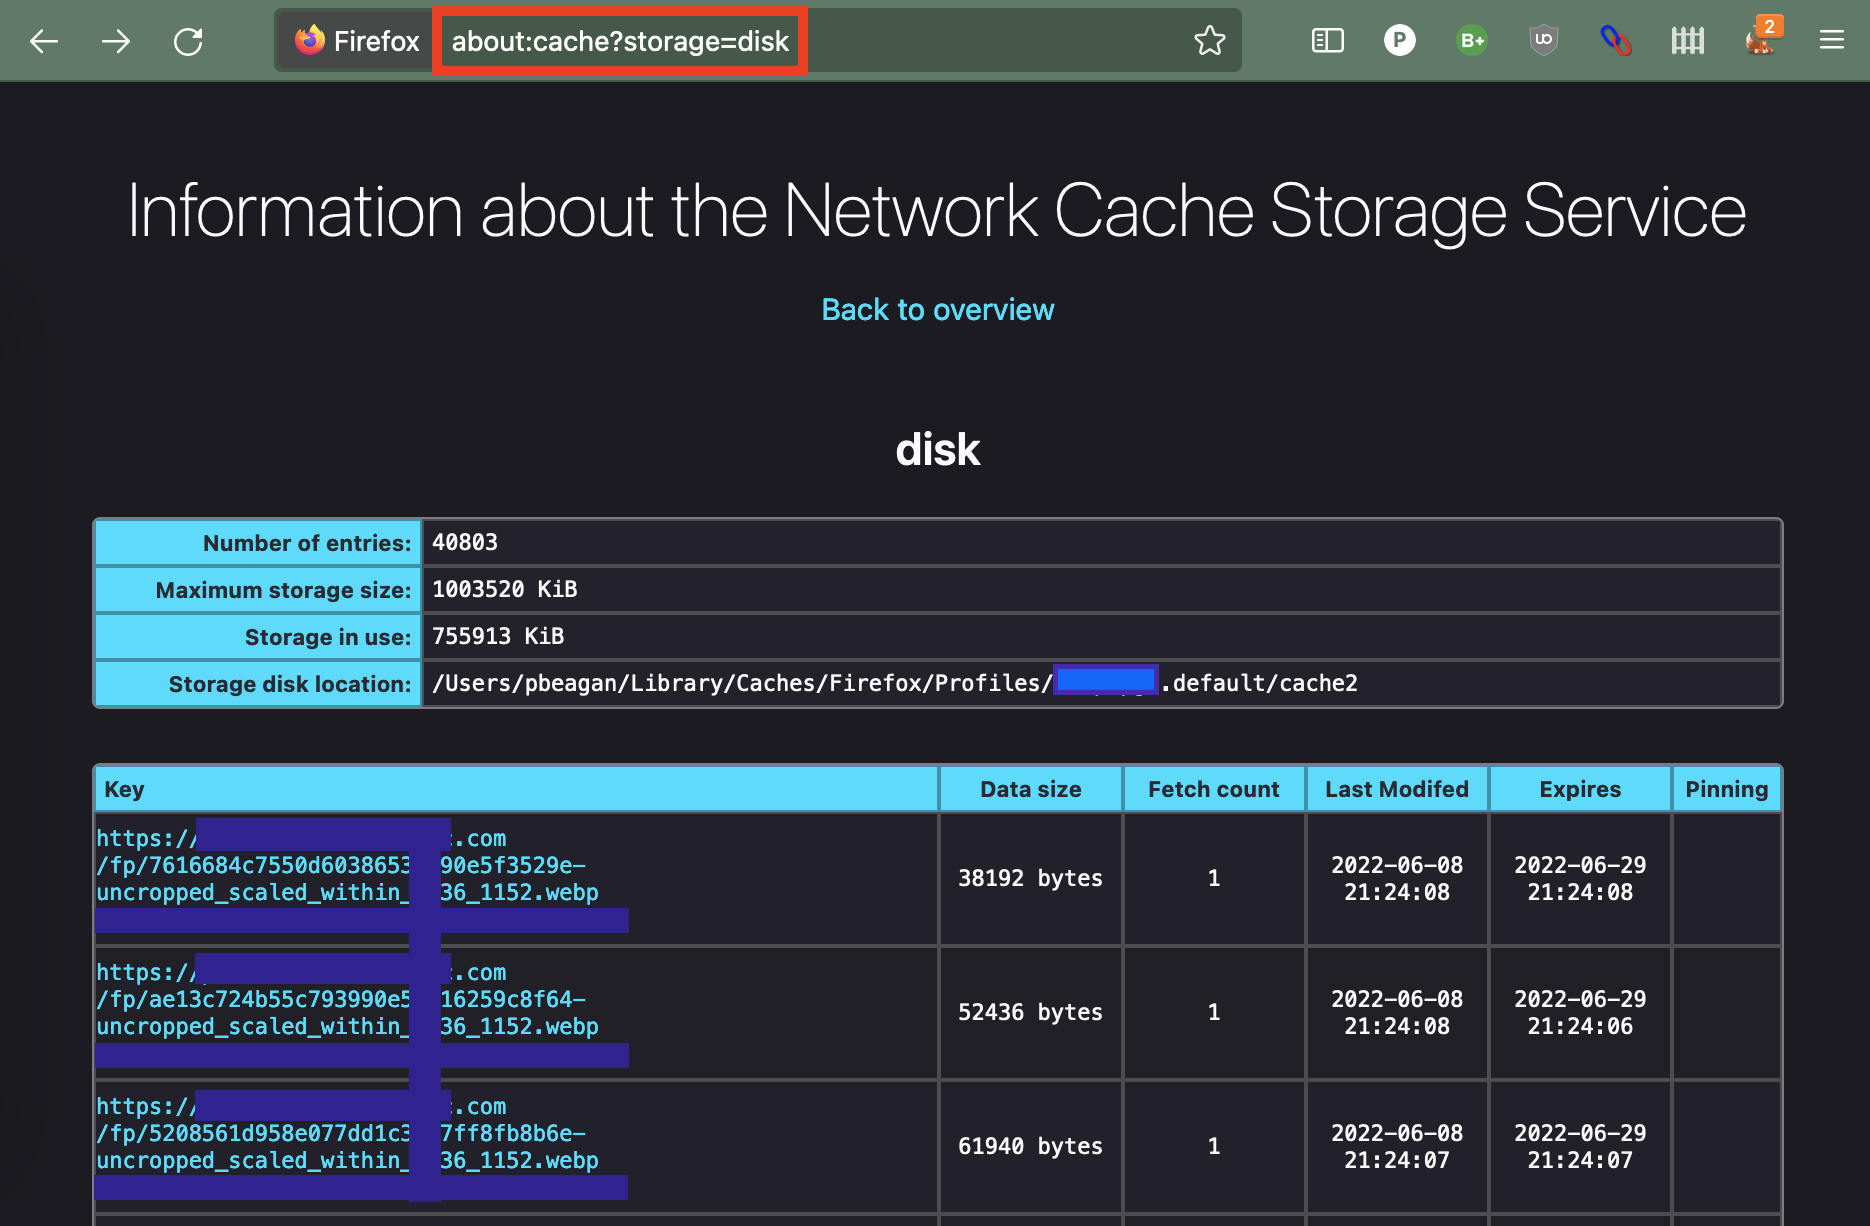
The next step is to navigate back to the about:cache?storage=disk page. You should see all of the relevant images right at the top.
Now you can copy-paste the urls you care about into a text file. Since they are sorted, you can highlight several of them at once and put them in the new text file all together.
An IDE shortcut
If you are using an IDE like VS Code, there is a pretty quick way you can process these urls. It relies on having multiple cursors. They are a game changer - if you haven’t tried them, you’re missing out!
You can highlight the domain name of a url and use the select next word macro to highlight all of the occurances. By default, this should be cmd + d. I’ve got intellij bindings on, so for me it’s ctrl + g.
From there, you can:
- select to the end of the line with
cmd + shift + right arrow, - copy with
cmd + c, - select all with
cmd + a, - delete, and
- paste with
cmd + v
to have a list of just the urls. Easy!
Using wget to finally download the images
Once you’ve made it this far, you should have a text file with the list of image urls. There should be one url per line. For example’s sake, let’s assume that your file is named ~/Downloads/images.txt.
You should be able to run the commands
cd ~/Downloads
wget -i ./images.txt # -i stands for input file
to finally download all of the images you were looking for!
Conclusion
This was a lot of effort to download some files! Why did we bother?
The main benefit of this approach is that it will work even if images are loaded asynchronously. If we were to use wget right away and mirror the web page, it would have only detected the images that were there on the first load. Since images are frequently loaded in later via javascript, this would have caused a problem!
The other benefit is that the website can’t artificially block you from downloading the images. As long as the images are publically available, this method will always work - you’ve already viewed the files, so you know that they are accessible.